
Last modified on July 21, 2026 by Javier González
EXERCISES TO HOLD YOUR HANDSTAND | STREET WORKOUT
This is the second part of my guide to learning the handstand. If you haven’t read my introductory article yet, I recommend doing so before continuing. It will help you understand the proper form required for this movement, which we will apply now. We are going to cover a series of exercises that will allow you to hold your handstand longer. This is not a fixed routine, so you don’t need to perform them one after another. Pick two or three that feel most comfortable to you, and train them preferably at the beginning of your workouts. If you do them at the end, you will be fatigued, making it much harder to maintain balance and proper form.
Handstand Exercise List
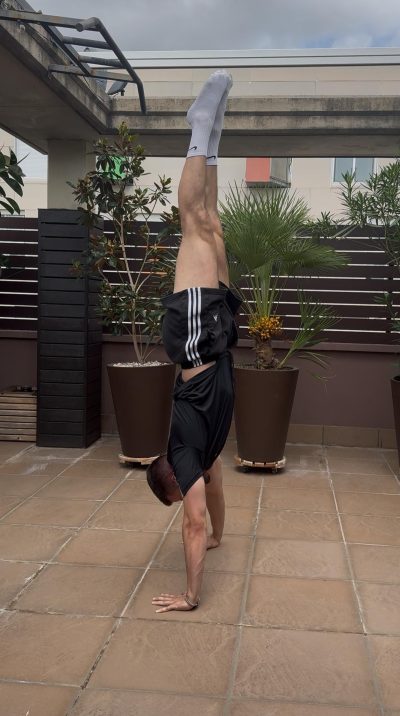
SHOULDER FLEXIBILITY
One of the main initial issues when learning the handstand is stiff shoulders. A lack of flexibility and mobility in this area directly impacts your position, preventing you from getting into a straight line. To address this, I have brought three types of stretches that will help unlock and release tension in your shoulders. There is no single ideal time to perform these exercises, any time works well. If you choose to do them before training, your flexibility will improve, making the handstand easier. If you stretch after your routine, you will reduce accumulated fatigue. Either way, you will get great benefits.
HANDSTAND SIMULATION
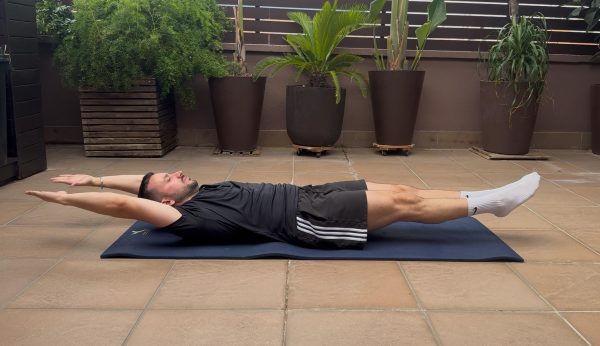
This exercise is crucial for understanding proper posture before attempting the handstand. To do this, lie flat on your back on the floor and make sure you hit the following points:
1. Fully extended limbs: do not bend your arms, they should be fully locked out. The same goes for your legs, all the way down to pointed toes.
2. Scapular elevation. As you can see, my shoulders remain in contact with the floor.
3. Posterior pelvic tilt. After engaging your core and glutes, your torso settles so that your lower back and glutes become the points of contact with the floor, keeping your lower back aligned.
You can also do this face down, and in that position you will notice your stomach is no longer touching the floor.
This is extremely valuable for the handstand, naturally, but you will also gain general body awareness for other skills, as engaging your core and maintaining a posterior pelvic tilt are key fundamentals across many exercises.
ADVANCED PLANK POSITION
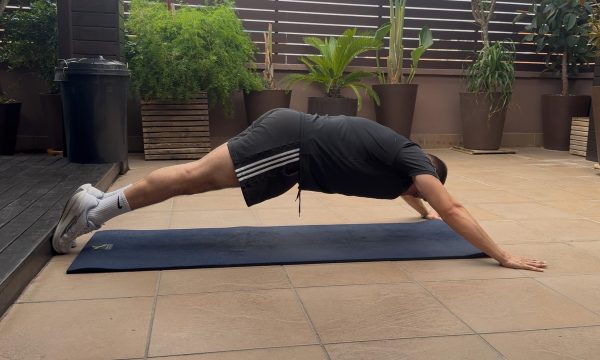
I explain this movement in detail in my core exercises section. Today I am bringing you a more advanced variation, which consists of placing both hands further forward without losing your form, just as you see in the image. The tension increases considerably, so you should limit the hold time compared to a standard plank, for example, going from 45 seconds down to 25 seconds.
It will be much easier for you if you have ever used an ab wheel, which is also covered in the core section, since the end range position closely resembles what we see in this plank.
ASSISTED HANDSTAND
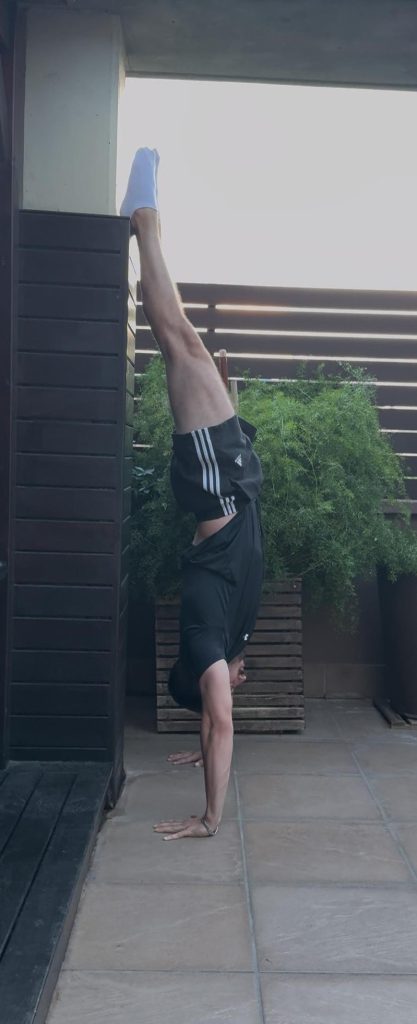
Now we move on to the handstand position, but this time using wall support. It is better to face the wall, although you can also do it facing away. Practice toggling back and forth into the correct form by engaging and relaxing your core and glutes. This will help you internalize both scapular elevation and posterior pelvic tilt. In this position, it is common to pull your chest away from the wall, closing your shoulders and losing that crucial scapular elevation. Once you ensure your form is solid, hold the position firmly for a few seconds.
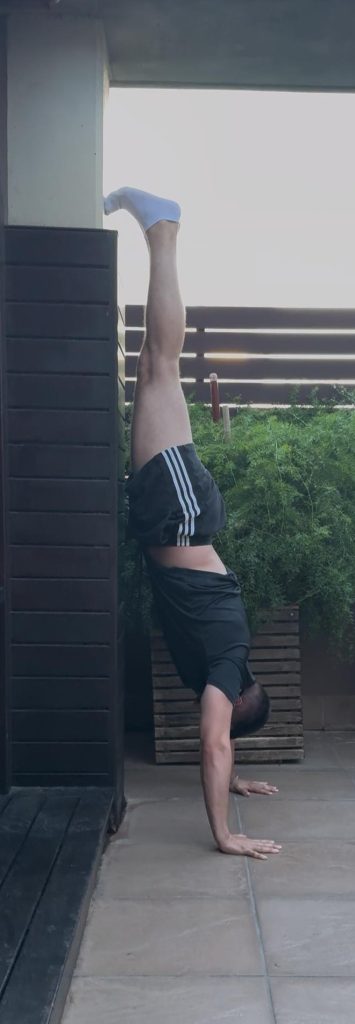
STEPPING AWAY FROM THE WALL HANDSTAND
From the position in the previous exercise, move your hands as far away from the wall as possible without letting your feet leave it. Your hands and feet must form a straight line, creating a diagonal angle. Hold this position for a few seconds, applying all the technical cues discussed earlier.
ASCENT AND DESCENT
Now that you have learned all the key exercises, let us combine them. You will start from a standard plank and walk your way up into an assisted handstand. Next, you will gradually walk back down until you return to the plank position, but this time you will take it a step further and execute the advanced variation with your arms extended.
I hope these exercises help you learn and improve your handstand, always maintaining proper form. As mentioned at the beginning, they are ideal for the start of your workout when planning to perform handstand skills. This way you warm up and get familiar with the posture. You can also combine them into a small standalone routine if you prefer. Best regards!

Leave A Comment