
Last modified on July 20, 2026 by Javier González
CALISTHENICS BACK EXERCISES
Back exercises are one of the key pillars of calisthenics training.
This discipline naturally pushes athletes to build upper body strength in order to progress and master the skills they’re chasing. Even if your goals are more practical—like improving posture or building general strength—it’s essential to dedicate time to the exercises I’ll show you below. On top of strengthening your back, they can also help relieve tension caused by poor daily habits.
In this article, I’ll answer some common questions like:
How many back exercises should I do? Which muscles do these back exercises target?
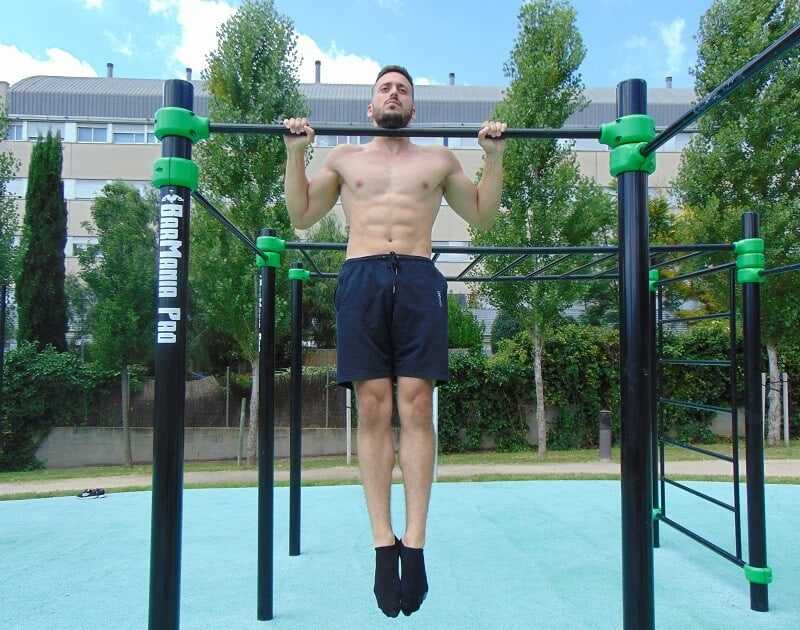
Calisthenics back exercise #1: Pull-ups
Pull-ups are the king of vertical pulling movements in calisthenics. If you’re serious about building a strong back, this is a non-negotiable, it must be on your calisthenics back workout. Even though it’s a classic exercise that’s been around forever, there’s still a lot of confusion out there about proper form, muscles worked, and how to train them effectively. So let’s break that down.
If you can’t do a pull-up yet, no worries. I’ll walk you through the right progressions to get you there.
Pull-ups might just be the most powerful upper body movement you can do in street workout (maybe tied with handstand push-ups). The difficulty is moderate to high, especially if you’re new to training. If you’re unable to do a full rep yet, start with assisted pull-ups using resistance bands. If those are still too tough, begin with australian pull-ups (bodyweight rows), which will build the base strength you need to work your way up.
On the other hand, if pull-ups feel easy, add weight with a dip belt and progress at your own pace.
What muscles do pull-ups work?
TECHNIQUE
Pull-up technique isn’t particularly complex, but honestly, it’s one of the most poorly performed exercises out there by far. I’m not sure why, but it’s super common to see people doing them with kipping (using momentum to make the movement easier), cutting the range of motion short (not going all the way down or up), or completely forgetting to engage their core and control the movement.
Whenever you’re doing pull-ups, make sure you’re using proper form. Here’s what that looks like:
Grip: The standard grip, and the one I almost always use, is a pronated grip, with your palms facing the bar and your hands shoulder-width apart or slightly wider. That said, you can experiment with different variations like supinated, neutral, or mixed grips, and you can also play around with grip width to make things more challenging. I’ll include a photo carousel below so you can see what each one looks like.
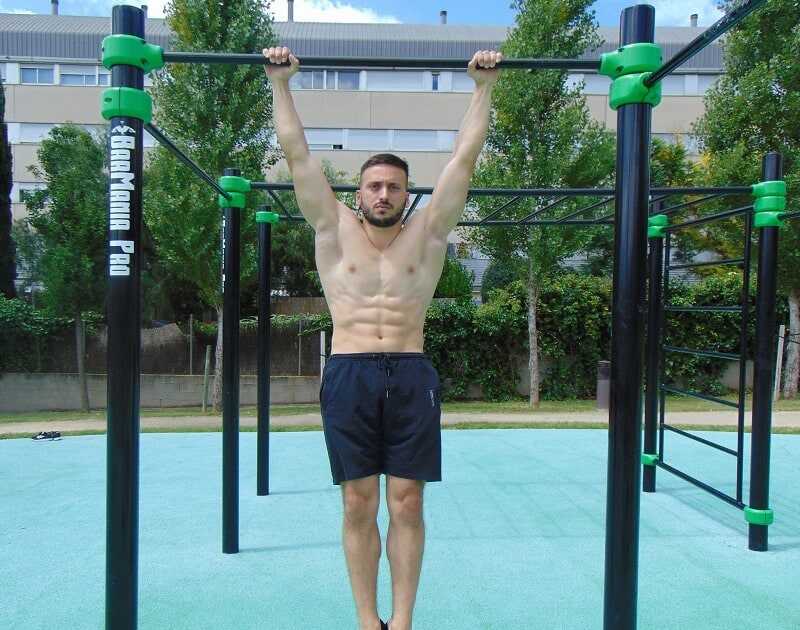
Range of motion: Start from a dead hang with your elbows fully locked out, as shown in the image above, and pull yourself up until your chin clears the bar. You can extend the range by bringing your chest to the bar or even going deeper on the way down, but the minimum standard should always be getting your chin over it.
Form: Keep your core and glutes tight, and focus on pulling as if you were trying to break the bar down, not climb up to it. Perform a scapular retraction (squeeze your shoulder blades together) to reduce injury risk and maximize force output. It’s important to maintain good form on every rep. If that means doing slower, more controlled negatives (on the way down), go for it, otherwise, the swinging might mess up your next rep.
Calisthenics back exercise #2: Australian pull-ups
One of the very first exercises people learn in street workout is the Australian pull-up. It targets pretty much the same muscle groups as regular pull-ups, so if those are still out of reach for you, this is your best ally. The great thing about this movement is that anyone can do it, since the intensity is much lower. All you have to do is adjust the angle and body position until you can perform a full rep. You can bend your knees (to make it easier) or elevate your feet (to make it harder), and play with the difficulty that way.
Before diving into the technique, the first thing you need to know is that this exercise is performed on a low bar. If your local park doesn’t have one, parallel bars work just fine. As I mentioned earlier, it activates the same muscles as the pull-up, but let’s break down a few specific points:
Muscles worked
TECHNIQUE
Grip and range of motion:
The main grip here is pronated and shoulder-width, just like with regular pull-ups. That said, since this is a more accessible exercise, I recommend using it as a chance to explore different grip variations—wide, medium, and close. For example, a great set could start with a few reps using a wide grip, then switch to medium, and finish with a close grip. You can do the exact same sequence with a supinated grip to target the biceps more and give your muscles a fresh stimulus.
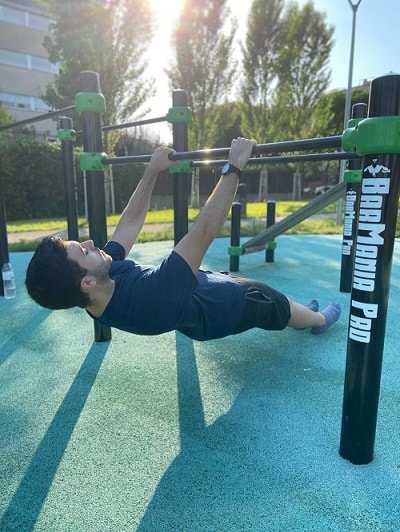
Form:
Pay close attention to this—it’s key. As you can see in the image, my body is fully extended, which is the full range of motion for an Australian pull-up. Still, you can adjust the angle and make it more vertical to scale the difficulty and work your way up through progressions. I’ll drop a few images below so you can see exactly what I mean.
Execution:
Start from a straight and firm position, with your elbows fully locked out. Pull until the bar reaches chest level. As for your feet, it doesn’t really matter much. I personally keep them together. Of course, your core and glutes need to stay engaged throughout the entire movement to keep your body from sagging, which is one of the most common mistakes for beginners.
I encourage you to keep practicing until you master it. It’s a good idea to start testing out pull-ups along the way to see if the strength you’re building with Australian pull-ups is paying off. Maybe you’ll manage to do one, or at the very least, you’ll be closer than you were when you started.
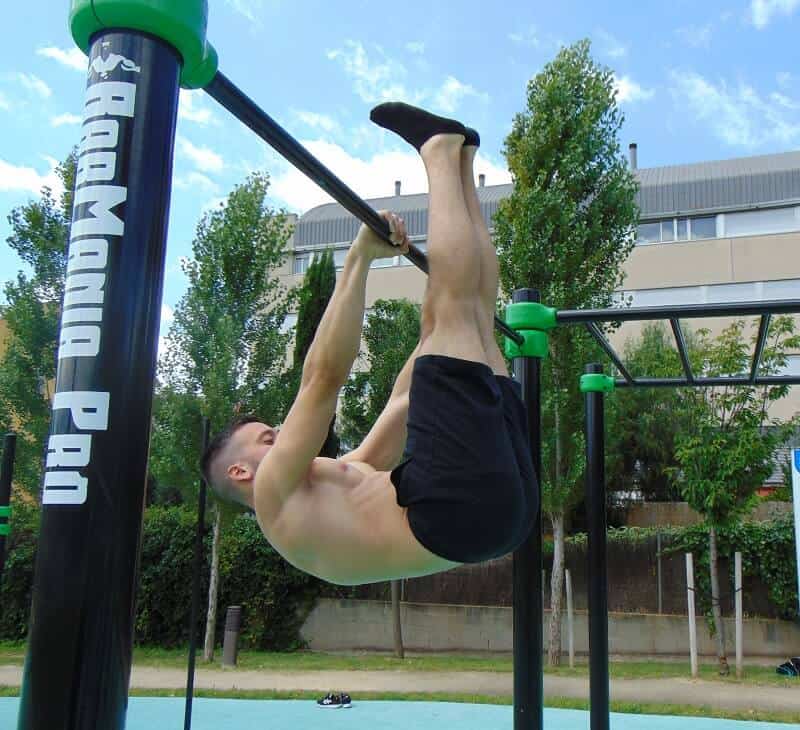
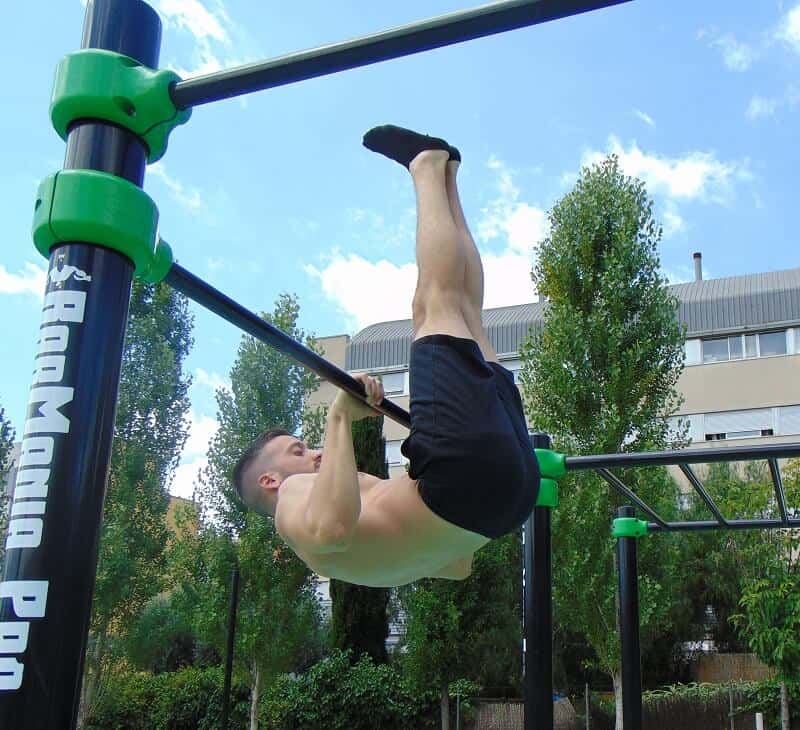
Calisthenics back exercise #3: L-sit Front lever rows
The front lever is a highly advanced back-focused exercise. If you’re interested in it, I’ve written a full article breaking it down in detail.
There’s one variation in particular that’s worth highlighting: front lever rows. While doing them with full front lever form is nearly impossible for most people, there’s a very useful progression you can start with tucked pull-ups. These involve a horizontal pulling motion, which is important to point out, since most calisthenics pulling exercises are vertical (like pull-ups), and horizontal movements often get neglected.
That’s why this exercise is perfect to pair with pull-ups or Australian pull-ups. It’s definitely more advanced than the previous two, so I recommend adding it to your training once your back is already strong and you’re comfortable holding the tucked position.
What muscles does it work?
TECHNIQUE
Grip and range of motion:
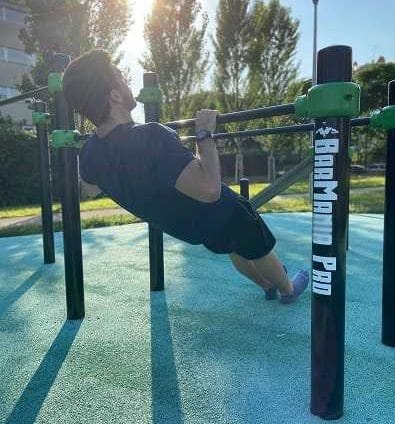
To start with, I recommend using a pronated grip, though you can mix in supinated sets as well to get used to that position. As for the range, even though in the image on the left I’m pulling at shoulder width, it’s actually easier if you bring your arms in closer, keeping your elbows tight to your body to form a solid, compact block.
Posture:
This exercise comes with an extra challenge: you first need to master a static hold. Here’s what that position looks like:
- Arms fully extended, elbows locked out
- Scapular retraction
- Posterior pelvic tilt (you’ll get this by squeezing your glutes and core)
- Legs perpendicular to your torso
- Plantar flexion (toes pointed)
- Neutral neck position (no straining)
It’s super important that you can hold this isometric position—with a straight back—for a good number of seconds. Start by holding the position without pulling. Once you’re solid at it (at least 20 seconds), you can begin working on your tucked pull-up sets.
The full range of motion involves pulling your body toward the bar—ideally until the bar is around hip level—without breaking form at any point. At first, you probably won’t be able to complete the full range, and that’s fine. Just aim to cover at least half the movement.
Recording yourself or having a friend watch you is super helpful in the beginning, since it’s easy to fall into bad form or tilt your body too far forward or backward without noticing.
Stop Guessing. Start Growing.
Get a professional roadmap built specifically for your current level and goals.
Get My Personalized PlanSo… how many back exercises should I actually do?
After reading this post, you might be wondering: should I train all three exercises? Are one or two enough? And my answer is: it depends.
If you’re a beginner, I recommend focusing on Australian pull-ups, and pairing them with pull-ups or pull-up progressions.
If you’re intermediate, stick with pull-ups and Australian pull-ups.
If you’re more advanced and feel ready for front lever rows, my go-to combo is pull-ups and front lever rows.
Which one to do first and which one after? That’s up to you—it depends on your focus and goals.
Leave A Comment